Less clutter and more eye candy
The Notification Center on your Mac conveniently houses the notifications that you miss or don’t have the time to deal with right away. It also acts as a one-stop destination to access and interact with widgets. Starting with macOS Big Sur, however, the Notification Center received a significant update that changed how things work.
Both notifications and widgets now look quite similar to what you get on the iPhone and iPad. But, they are also streamlined and easier to deal with compared to before. Below, you’ll find everything that you need to know about using and customizing the new and enhanced Notification Center on your Mac.
Table of Contents
How to Open Mac Notification Center
With macOS Big Sur, Apple has done away with the dedicated Notification Center icon on the Mac’s menu bar. Instead, you must select the Date & Time indicator—a.k.a. the Clock icon—to open the Notification Center. You can also swipe in with two fingers from the right edge of a trackpad to bring it into view.

To close the Notification Center, just select any area outside of it. Alternatively, you can select the Date & Time indicator again or perform a two-finger swipe to the right on a trackpad.
Tip: You can also set the Notification Center as a hot corner on your Mac.
How to Use Notification Center
The new Notification Center is quite different—you don’t have to switch between the Today and Notification tabs as you did before. Instead, notifications are listed at the top, and widgets are located at the bottom. That makes interacting with them much easier.
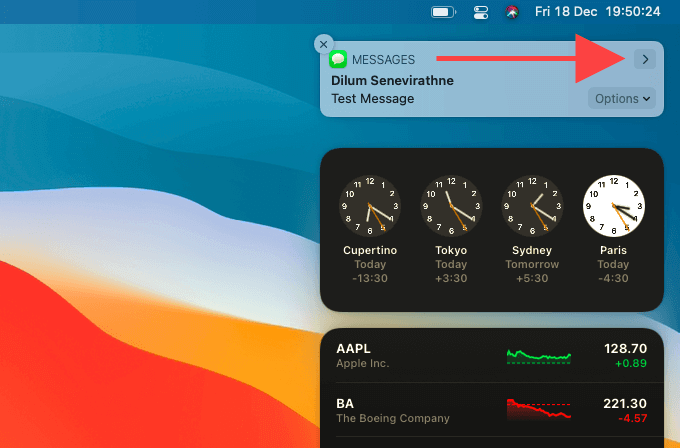
There are multiple ways to deal with a notification—you can simply select one to open the email, message, reminder, etc., in the relevant app. Or, you can hover over it and select the arrow icon in the top-right corner to reveal additional options—for example, a notification from the Messages app will allow you to compose a reply from the Notification Center itself.
Some notifications are grouped—or stacked—by app or by type, and that helps cut down a lot of the clutter. Just select a stack to expand it. You can also dismiss any notification or notification stack by selecting the x-shaped icon on the top right corner.
Widgets, on the other hand, show a lot of detail upfront, but you can’t interact with them directly. Instead, they’re deep-linked to certain areas of the related apps. Selecting a specific episode on the Podcasts widget, for example, will load the appropriate page in the Podcasts app.
How to Mute/Unmute Notifications
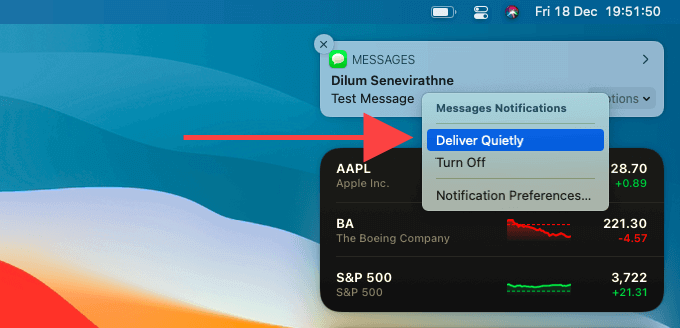
If an app bugs you with a constant stream of notifications, you can mute it quickly. Just right-click a notification outside or inside the Notification Center and select Deliver Quietly.
Future notifications from the app will not show up on the desktop. Instead, they will arrive at the Notification Center directly, allowing you to deal with them whenever you want.
To unmute notifications, right-click a notification or notification stack from the same app within the Notification Center and select Deliver Prominently.
How to Activate Do Not Disturb
You can mute all notifications and have them delivered directly into the Notification Center by activating Do Not Disturb. To do that, just hold down the Control key and select the Date & Time indicator.
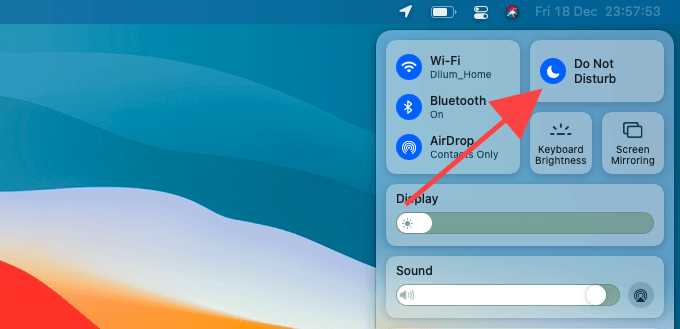
Or, open the Control Center on your Mac and select the Do Not Disturb icon. The Date & Time indicator should gray out to indicate that Do Not Disturb is active.
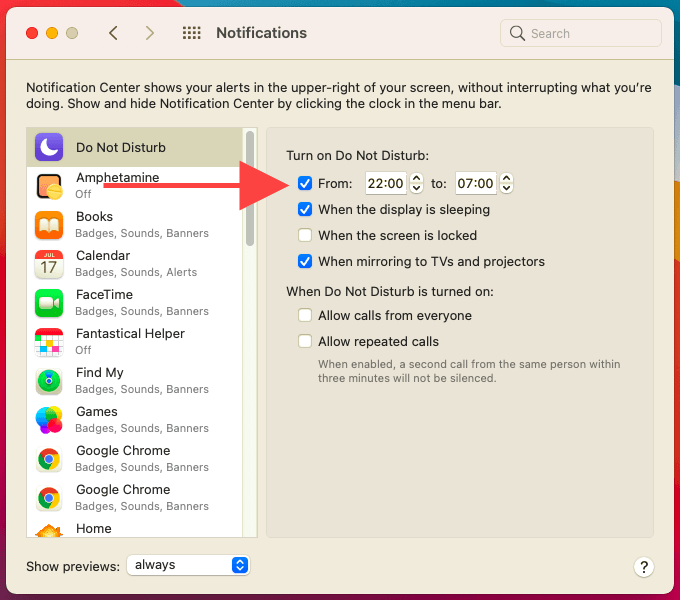
Additionally, you can set a Do Not Disturb schedule to kick in each day automatically. Go to System Preferences > Notifications and select Do Not Disturb on the sidebar. Then, check the box next to From: and specify the time period.
How to Disable/Enable Notifications
Aside from muting and unmuting notifications, you can completely turn off notifications for an application. Just right-click a notification outside or inside the Notification Center and select Turn Off.
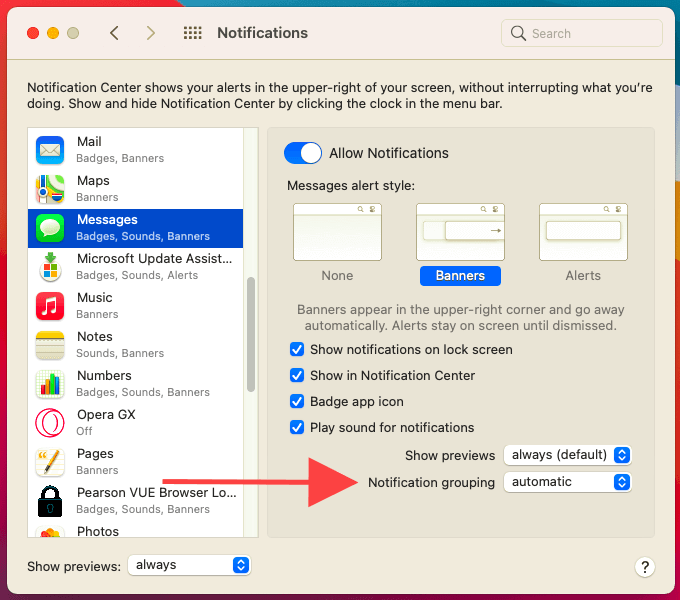
To re-enable notifications for the program at a later time, open the Apple menu and go to System Preferences > Notifications. Then, select the app from the side-bar and turn on the switch next to Allow Notifications.
How to Change Notification Grouping
By default, the Notification Center groups together notifications automatically by app or by type. For example, you may see iMessage-related notifications grouped into a single stack, or you may see separate stacks for each conversation thread.
You can change how that works for each app by heading into System Preferences > Notifications. Then, select an app, bring up the menu next to Notification grouping, and select either of the options:
- automatic: Default setting that groups notifications by app or by type.
- by app: Sorts notifications by app only.
- off: Disables notification grouping for the app.
How to Add Widgets
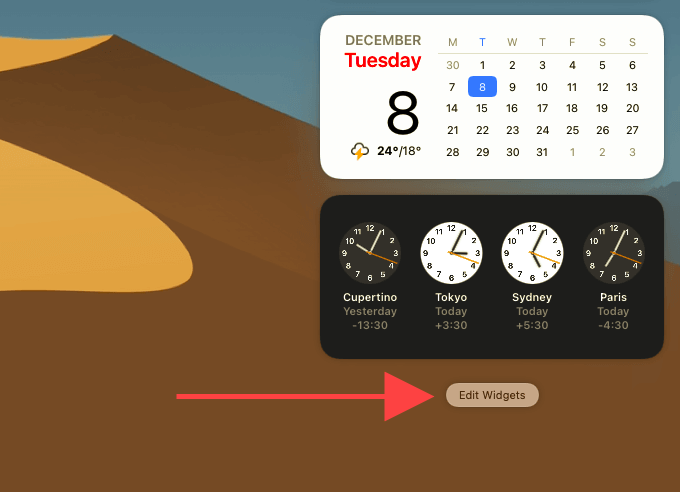
By default, the Notification Center only features a handful of widgets such as Clock, Weather, and Calendar. You can add more widgets from both native and third-party apps by heading into the widgets gallery. To get there, scroll down to the bottom of the Notification Center and select Edit Widgets.
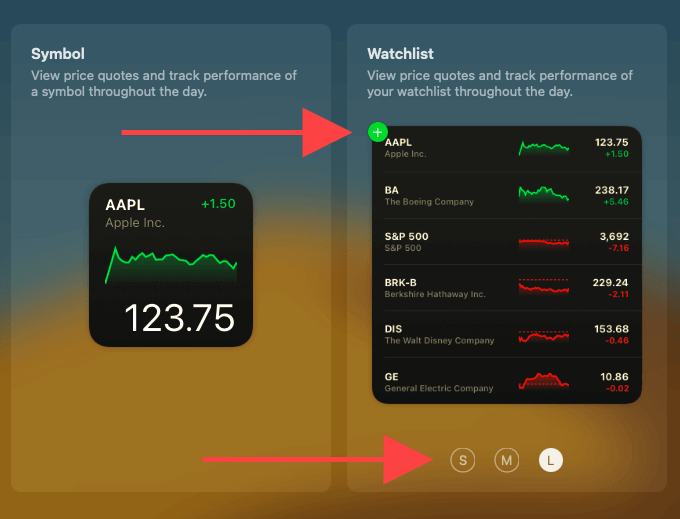
You can then flick through the various apps with widget support to the left of the gallery. Widget previews will show up in the center of the screen. Some widgets also come in multiple sizes—use the S, M, and L icons to switch between the small, medium, and large sizes. Then, select the Plus icon at the top-left of a widget preview to add it.
How to Rearrange Widgets
It’s easy to rearrange the order of your widgets within the Notification Center. Just drag a widget up or down and release it in the location where you want it to stay. You can also have two smaller-sized widgets next to each other.
How to Customize Widgets
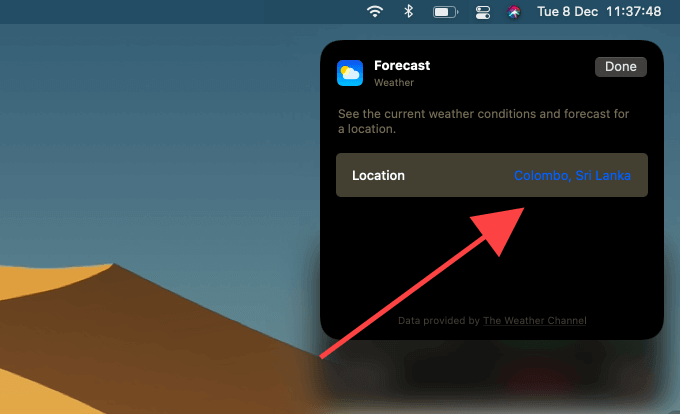
Some widgets in the Notification Center are directly customizable. For example, both the Clock and Weather widgets allow you to pick a location to display the correct time and weather-related information, respectively.
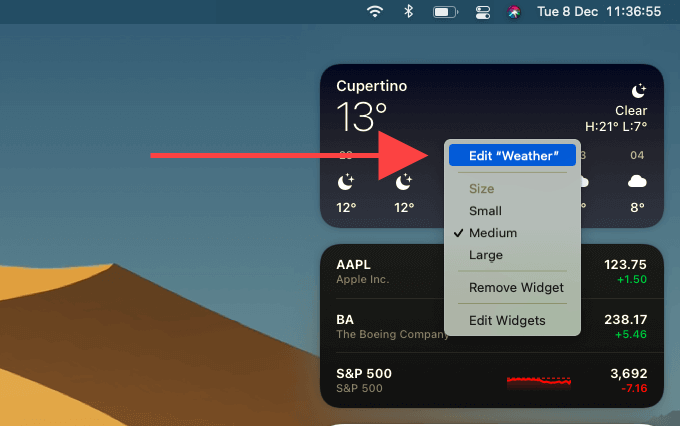
To customize a widget, just right-click a widget and select Edit [Widget Name]. Then, make the necessary modifications and select Done.
How to Resize Widgets
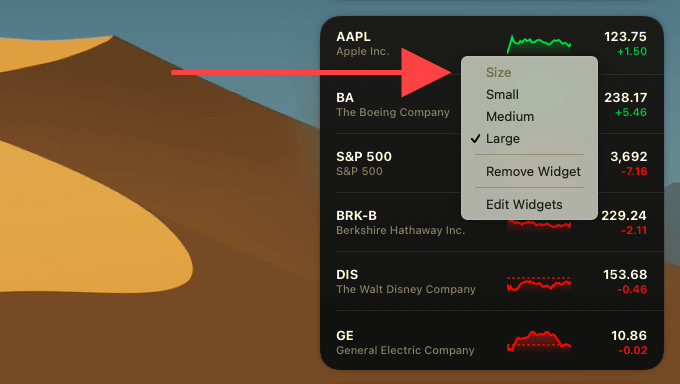
The Notification Center allows you to easily change the size of a widget even after you’ve finished adding it from the widgets gallery. Right-click the widget and select Small, Medium, or Large.
How to Remove Widgets
If you want to get rid of a widget from the Notification Center, just right-click it and select Remove Widget. You can also head into the widgets gallery and select the Delete icons on the Notification Center preview area to remove multiple widgets faster.
Stay Notified
The Notification Center in macOS Big Sur is a significant upgrade from a usability perspective. Notifications look less cluttered, and widgets are aesthetically pleasing and more fun to play with. There’s also a lot more when it comes to customizing widgets, in particular—go through our macOS Big Sur widgets customization guide for more details.
Subscribe on YouTube!
Did you enjoy this tip? If so, check out our YouTube channel from our sister site Online Tech Tips. We cover Windows, Mac, software and apps, and have a bunch of troubleshooting tips and how-to videos. Click the button below to subscribe!
Subscribe